So, you finally got your dream car, but mother nature has you stuck at home. These DIY projects are good ways to spend some quality time with your pampered Porsche.

Vinyl graphics kits can be long lasting, but are always temporary, and can always be removed at any time. So, have fun with the unlimited possibilities of styles and color combinations. Express yourself and take lots of photos. Lets see what you come up with.
This is what we’ll be looking at:
Black Headlight Trim
Replacement stone guards
Stripe Kits
Black Headlight Trim
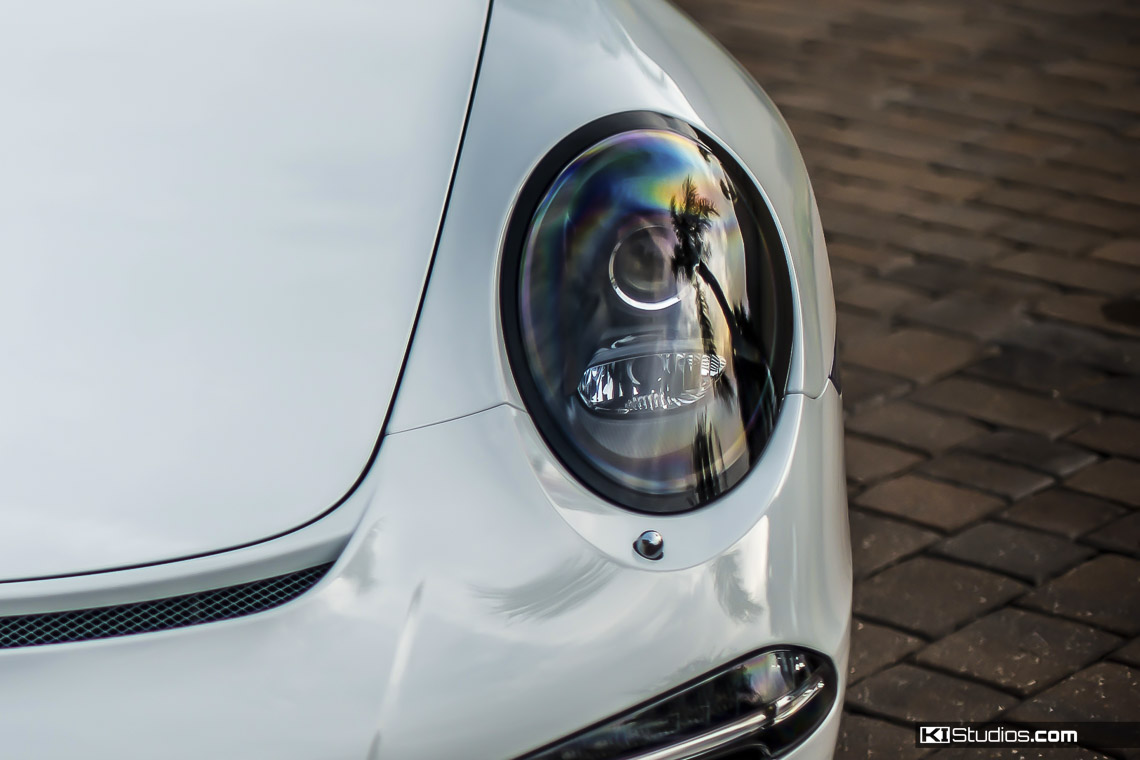
Contrast is the name of the game. These vinyl headlight trim kits are an easy DIY project, made to black out the silver ring on the outside of Porsche 987, 997, 981, and 991 headlights. They mimic the look of the special edition models like the Porsche 997 Sport Classic, 997 Cayman R and the 991 Turbo Exclusive Series.
The headlight trim is a perfect fit kit designed to be applied with no need for stretching or trimming. It is a wet application process, similar to window tint or stone guards. The wet application lets you slide it around until you get it in place. Don’t stress if you are left with tiny bubbles. If you didn’t get all of the water out, they will dry up and smooth out over the next couple of days, by just sitting in your garage.
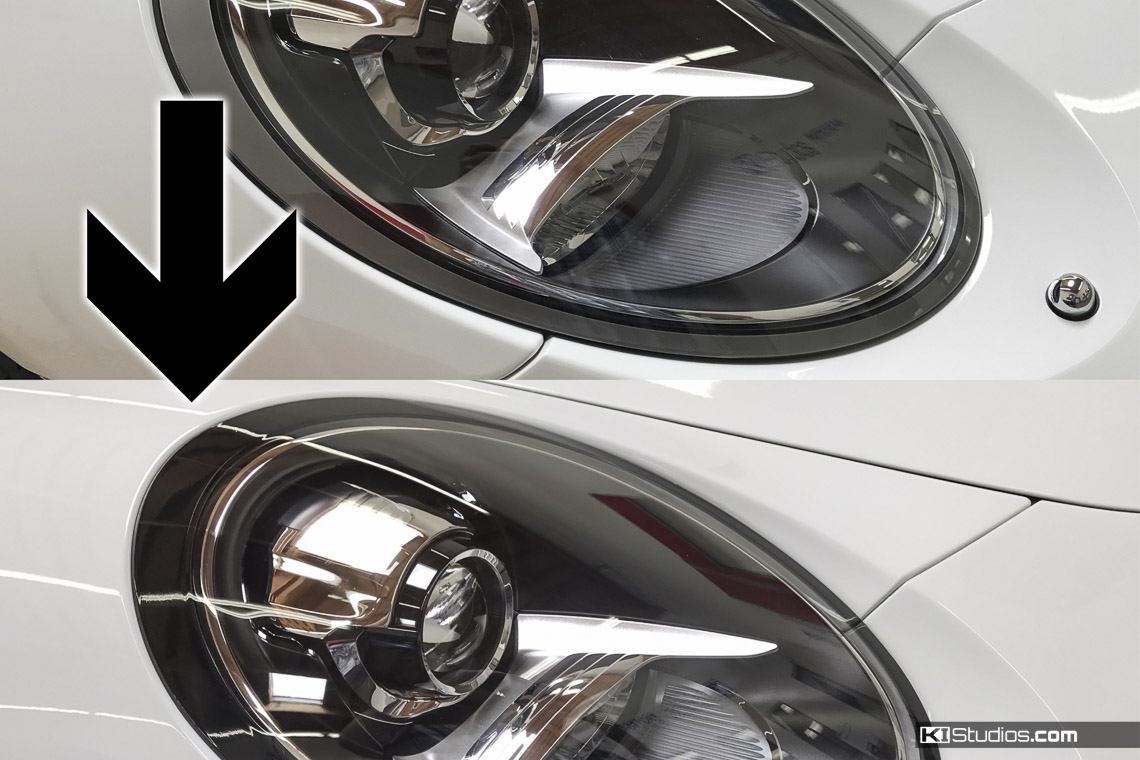
Gloss vinyl gives the look that appears as if the trim is inside the headlight. Matte vinyl has the obvious look of being outside the headlight. You could use any color you desire here, but generally, these are my recommendations for the most factory, or period correct look:
- Black cars: Matte black trim, for a subtle contrast between the light and the fender.
- 987 / 987.2: Gloss Black trim, for the Cayman R look.
- 997: Gloss Black trim, for the Sport Classic look.
- 991: Metallic black for the factory black option headlight look.
- 981: Metallic black
Here is an installation video, demonstrated on my own 987 Cayman S.
Headlight Trim Application Instructions
Headlight trim is a thin, wet application vinyl. Use two drops of Johnson & Johnson baby shampoo in a spray bottle of water for your application solution. The KI Studios spray bottle comes with soap, just add water. Removal of the headlights is NOT required.
Step 1:
Clean the headlights thoroughly using diluted isopropyl alcohol and water.
Step 2:
Generously spray the headlight with soap & water solution.
Step 3:
Peel the vinyl trim from the backing paper and immediately spray both sides of the vinyl generously with water to prevent sticking. Be careful not to get the backing paper wet before peeling.
Step 4:
Starting with the crown (top) of the headlight, slide the trim into place.
Step 5:
Squeegee out the water with the soft side of the squeegee from top to bottom until no water bubbles remain. Additional bubbles can be pushed out using the hard side of provided application squeegee.
Step 6:
Allow to dry in direct sunlight. You may speed up the drying process with a hair dryer or heat gun on low heat. Small bubbles may form as part of the drying process if you didn’t get all of the water out. Don’t worry, these tend to completely dry and disappear over the span of a couple hours to a couple of days.
Remove and Replace Yellowing Stone Guards
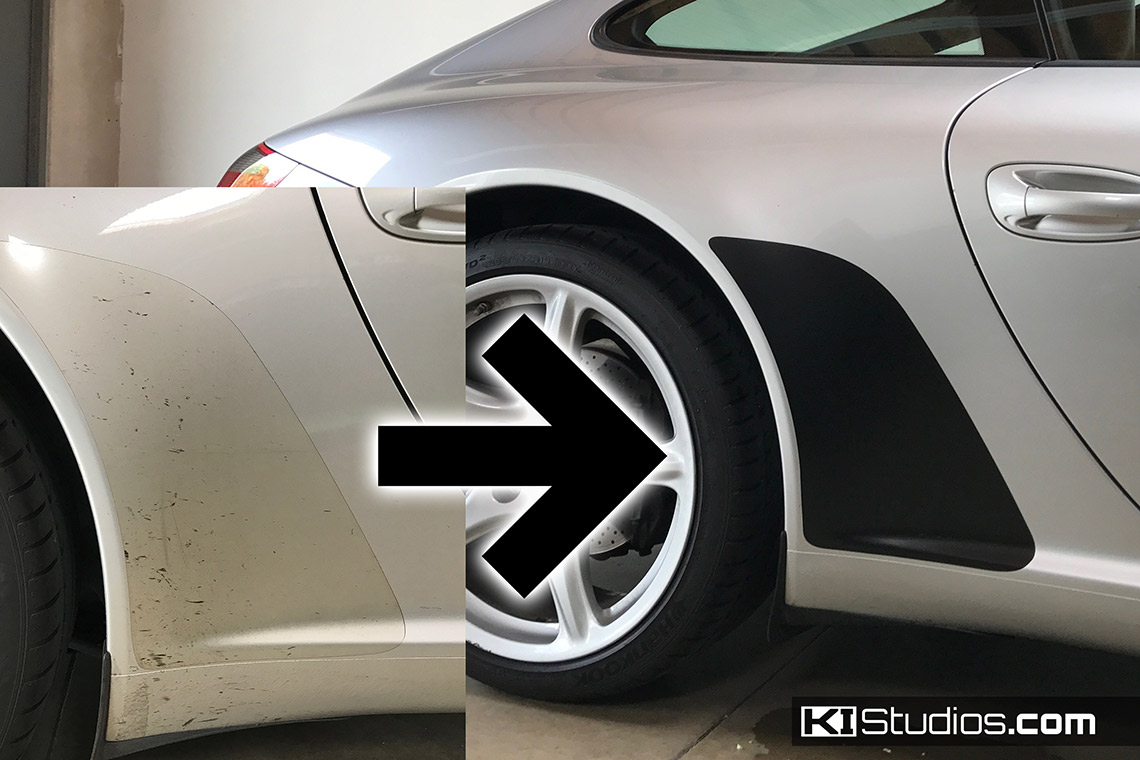
Traditionally, Porsches come with those shark fin shaped stone guards in front of the rear wheels. These are a clear paint protection film (PPF) that is there to protect those rear hips from being pelted by rubber and rocks kicked up by our own front tires, as well as those sneaky track day cones that always seem to jump out in front of us on the inside of turns.
Some older paint protection films are up to 12mil thick, but as clear bra / PPF has become more popular, manufacturers have realized thickness does not mean durability. Most modern films are now made from self healing 8mil thick film with a hydrophobic, strain resistant top coat, and have 7 to 10 year outdoor durability ratings. Porsche seems to opt for the traditional thick stone guards. This is probably why the factory shark fins tend to scratch, stain, and fade to yellow so quickly.
We offer replacement stone guard kits in both gloss clear, and matte black. Both are made with the latest 8mil, self healing, hydrophobic, stain resistant paint protection film.
The first step, is to remove those yellowing stone guards. Here is a video demonstrating how to remove them cleanly, using a standard clothes steamer:
Porsche 997 Carrera Stone Guards
Porsche 987 Cayman Stone Guards
Porsche 991 Carrera Stone Guards
Porsche 981 Cayman Stone Guards
Stone Guard Application Installation
Step 1:
Clean the vehicles surface thoroughly using rubbing alcohol and water.
Step 2:
Fill a spray bottle with 3 drops of baby shampoo and water, or use KI Studios application spray, just add water.
Step 3:
Generously spray the car, your hands, and the top of the film with application spray.
Step 4:
Peel the entire stone guard from the backing paper, and generously spray the adhesive side with application spray.
Step 5:
Slide the film into place on the car, use more spray if needed to slide easily.
Step 6:
Squeegee the film into place starting from the center out, until all the water is out.
Step 7:
Allow to dry over night.
Stripe Kits
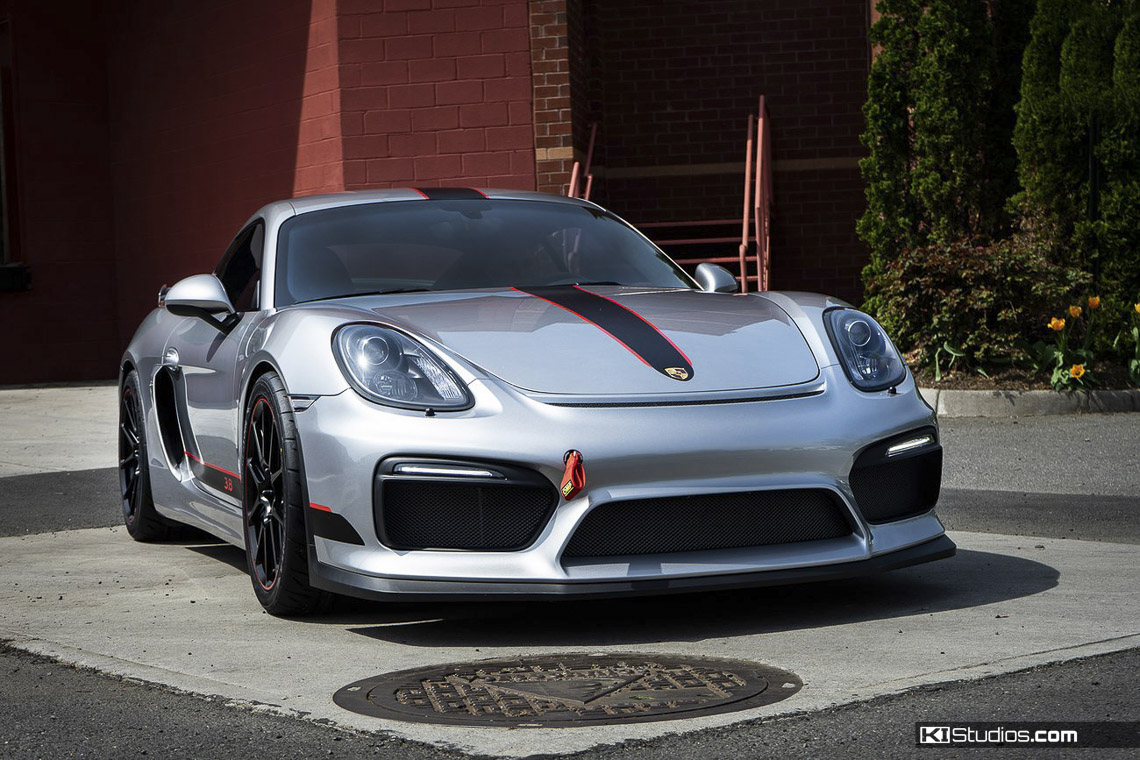
Time for a makeover? Stripe kits are a great way to make your car your own, and put your unique style on it. Of course, vinyl stripes can always be removed, so have fun with it. My 987 Cayman S is now 13 years old, and I have put over 114k smile inducing miles on it. I keep it feeling new to me by changing the look once in a while. I have gone through at least a dozen stripe styles. Personally, I have settled on Stripe Kit 007 (single color version) and Stripe Kit 008 (two color version) as my favorite.
Stripe kits are larger, and a bit more difficult than the headlight trim and stone guards, but are still a DIY project for those handy or crafty people. Two color kits, such as a matte black stripe with gloss red accents, would be applied in two layers. If you are looking for an easy DIY application, sticking with a single color stripe kit would be half the work. Stripes in 3 or more colors (like our Italia stripes for Ferrari’s) are done as a digital print in one layer, and have an all gloss finish.
Wet Application Instructions
Most stripes are a wet application vinyl decal made of three layers. The wax paper backing, the vinyl in the middle, and the transfer tape on top. Use two drops of Johnson & Johnson baby shampoo in a spray bottle of water for your application solution. The KI Studios spay bottle comes with soap, just add water.
Step 1:
Clean the vehicles surface thoroughly. Remove wax and polish with diluted isopropyl alcohol and water.
Step 2:
Tape the graphics in place using masking tape along the top edge. Measure to make sure they are straight if needed.
Step 3:
Peel the backing paper from the vinyl while the taped edge holds the graphics in place, and spray both the vehicle and adhesive side of the vinyl with water solution. Make sure not to get the backing paper wet!
Step 4:
Firmly squeegee vinyl in place, working from the center out, removing all of the water.
Step 5:
Wait 5 minutes, then carefully peel back the transfer tape layer, keeping it flat with the surface of the car so you don’t peel the fresh vinyl.
Step 6:
If needed, trim or tuck any extra overlapping edges.
Step 7:
If you have a two color / two layer stripe kit, your second layer will have a clear transfer tape to allow you to see positioning over the first layer. Peel the backing from the entire decal, spray generously and side into place. Repeat steps 4-6.
Step 8:
Allow the graphics to fully dry before washing or driving. To speed up the process, you can post heat with a heat gun on low power. Blot with a soft towel.
Show your stuff!
Email photos to [email protected]
Tag us on Instagram & Facebook @kistudios #kistudios